Slip Bobber Technique for Crappie Fishing
There’s nothing quite as frustrating as feeling those light, tentative bites while crappie fishing, only to set the hook into thin air time and time again. You know the fish are down there, maybe suspending just above a brush pile or hugging a subtle drop-off, but your traditional bobber just isn’t cutting it, or you’re constantly re-tying to adjust your depth. This guide is all about empowering you with the slip bobber technique, a game-changer for precise depth control that will help you put more of those elusive Kentucky crappie in your livewell.
Understanding the Slip Bobber Advantage for Crappie
Crappie, those speckled beauties we all love to chase, are notorious for suspending at very specific depths. They might be just inches above a submerged structure, right at the thermocline in summer, or tucked into shallow cover during the spawn. If your bait isn't presented exactly where they are, you're missing out on bites. That's where the slip bobber truly shines, giving you unparalleled control and sensitivity.
Why Depth Control is Crucial for Crappie
Think about it: you've spent hours scouting, found a promising brush pile in 15 feet of water, and your fish finder shows a distinct band of crappie holding at 8 feet. If you're using a fixed bobber, meaning it's clamped directly to your line, you're constantly limited to a shallow presentation unless you manually adjust it. This can be a real headache, especially if you're trying to cast any distance. Your bait might be hanging out at 3 feet, completely ignoring that sweet spot where the crappie are stacked. It's like trying to offer a candy bar to someone on the second floor when you're standing on the ground floor – you're just not in their zone.
Crappie are ambush predators, but they often won't chase a bait up or down very far. They're conserving energy, especially in colder water or when they're simply not in an aggressive feeding mood. Presenting your jig or minnow right at their eye level, or perhaps just a foot above them if they're looking up, can be the difference between a frustrating day of nothing and a fantastic day of consistent catches. This precision is absolutely paramount, and a slip bobber makes it easy to achieve, even for beginners.
The Mechanics of a Slip Bobber Rig
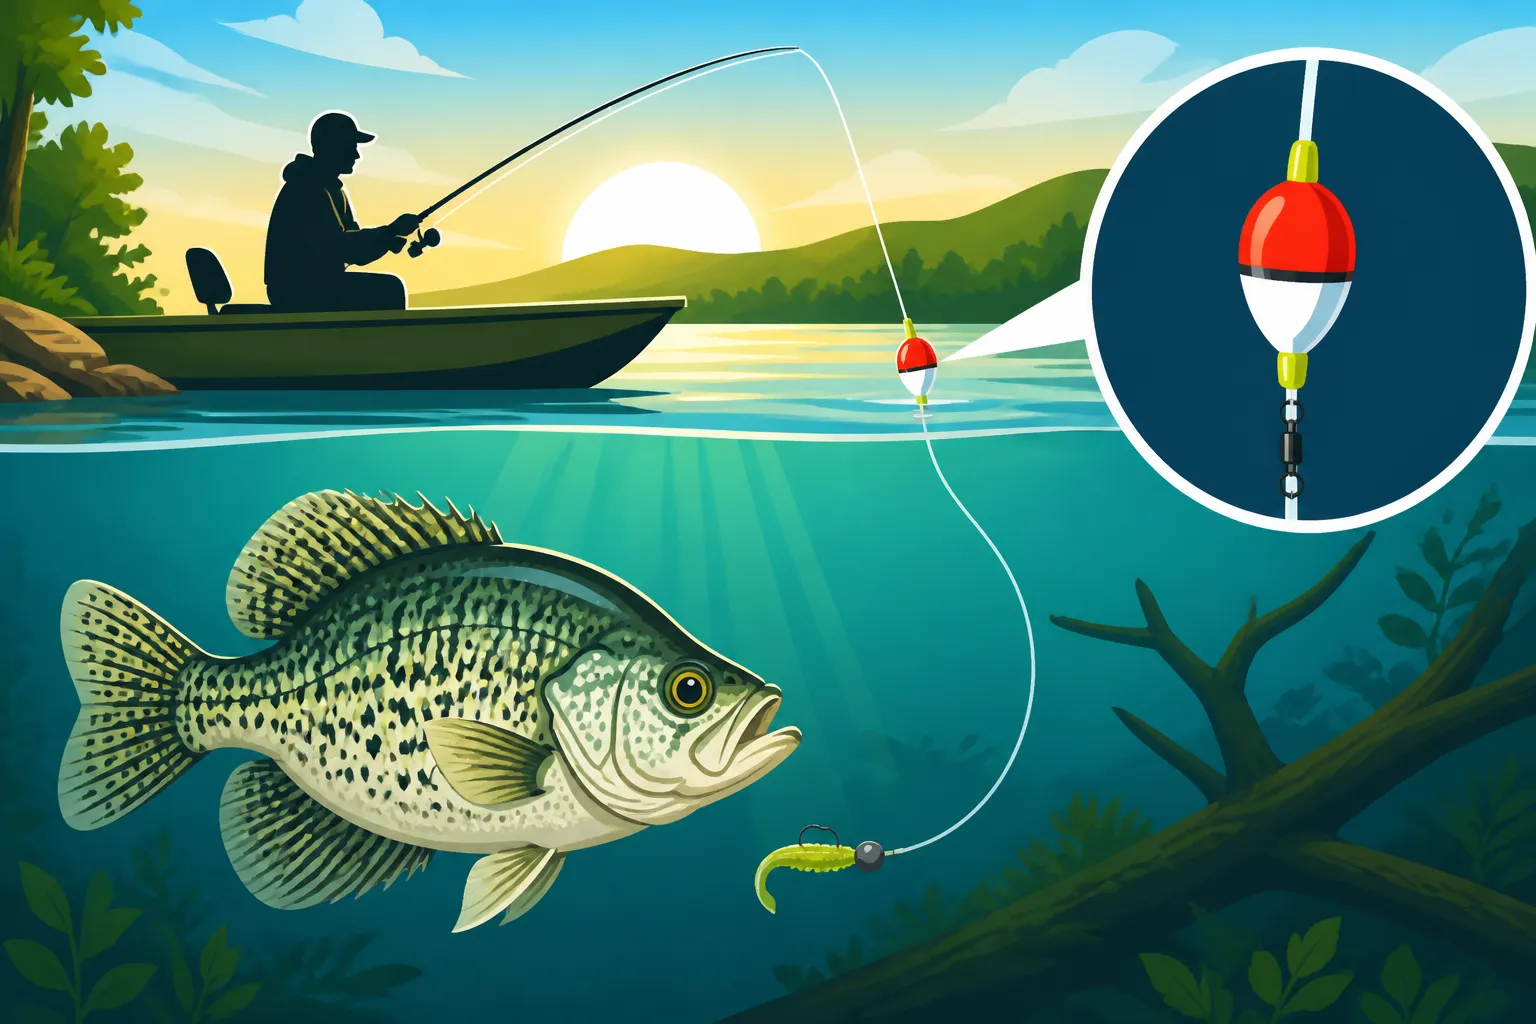
At its heart, a slip bobber rig is ingeniously simple, yet incredibly effective. Instead of being fixed in one spot, the bobber slips freely up and down your fishing line. The magic happens thanks to a tiny piece of line or rubber called a "bobber stop" that you tie or slide onto your main line. This stop acts as an adjustable anchor for your bobber.
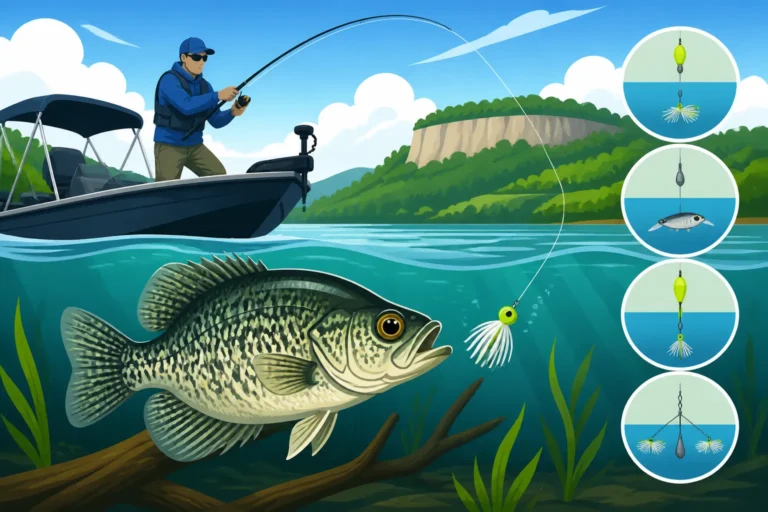
Here’s a breakdown of the components, from top to bottom on your line: First, you thread the bobber stop onto your main line. Then, a small bead goes on, which protects your knot from the bobber itself and allows the bobber to slide freely without getting caught on the stop. Next comes the slip bobber, which has a small hole through its center allowing the line to pass right through. Below the bobber, you'll attach your weight, usually a split shot or a small egg sinker, to help get your bait down to the desired depth. Finally, at the very end of your line, you tie on your hook or jig. The bobber stop determines the maximum depth your bait can sink, while the weight pulls your bait down past the freely sliding bobber. When a fish bites, the bobber dips, and because your line can slide through it, there's less resistance, leading to a more natural presentation and fewer dropped fish.
When to Choose a Slip Bobber Over a Fixed Bobber
While fixed bobbers certainly have their place – especially in very shallow water or when teaching kids to fish – the slip bobber really shines in specific scenarios. If you're fishing in water deeper than about 6-8 feet, or if the crappie are holding shallower than that but you need to make long casts, a fixed bobber becomes unwieldy. Imagine trying to cast a fixed bobber set to 12 feet of depth – you'll likely snag your line on every cast! The slip bobber allows you to reel your bobber right down to your rod tip for an easy, tangle-free cast, then it "slips" up the line to your pre-set depth once the weight of your jig or minnow pulls the line through it.
This technique is also superior when you need to constantly adjust your depth. Maybe you're drifting across a ledge that drops from 10 feet to 20 feet, or you're trying to locate a school of fish. With a slip bobber, a simple slide of the bobber stop is all it takes to change your fishing depth, a huge advantage over constantly re-tying. Furthermore, crappie often have a very subtle bite, and a slip bobber, being less resistant than a fixed bobber, will offer less drag to the fish, making them more likely to hold on longer, giving you a better chance to set the hook. This also allows for lighter baits and How to Rig a Jig for Crappie Fishing more naturally.
Setting Up Your Slip Bobber Rig for Kentucky Crappie
Getting your slip bobber rig set up correctly is half the battle. You want components that are durable, effective, and suited for the kind of crappie fishing you'll be doing here in Kentucky, whether you're on a big reservoir like Kentucky Lake or a smaller pond. Paying attention to these details will make your fishing experience much more enjoyable and productive.
Essential Components and What to Look For
Let's talk hardware. First, the bobber stop. You'll find two main types: string and rubber. String stops are often preferred for their small size and versatility; they cinch down tight on your line but can still be adjusted with a firm pull. Rubber stops, while quicker to put on, can sometimes create more friction on your line, especially if you're using very light monofilament. Look for a string stop that's easy to thread but holds firm. Many anglers buy pre-tied bobber stops that come with a small plastic straw for easy threading, and you can find these readily on Amazon or at any local bait shop.
Next, the bead. This small plastic or glass bead serves a crucial purpose: it prevents your bobber stop knot from slipping into the bobber's eyelet, which would defeat the entire purpose of the slip action. Choose a bead that's large enough not to pass through your bobber's eyelet but small enough to pass easily through your rod guides when casting.
For the slip bobber itself, you have options. Balsa wood or foam bobbers are classic choices, offering good buoyancy and visibility. Some modern bobbers even feature internal weights for better casting distance. The size of your bobber should match the weight of your jig or minnow – you want it just buoyant enough to suspend your bait, but not so large that it creates too much resistance when a crappie bites. A 1-inch to 2-inch slip bobber is generally a good all-around choice for crappie, allowing you to detect even the lightest taps.
Your weight is next. Small split shot sinkers are perfectly adequate for most crappie fishing. You want just enough weight to get your bait down quickly and keep your line relatively straight in the water, but not so much that it hinders the natural presentation of your bait or overpowers your light crappie rod. Experiment with different sizes – typically, one or two #7 or #5 split shots will do the trick. Lastly, your jig or hook. For live minnows, a fine-wire aberdeen hook in size 2 or 4 is ideal. For jigs, a 1/32 oz or 1/16 oz jig head with a soft plastic body like a Bobby Garland Baby Shad or a tiny tube jig are popular choices for Best Crappie Jigs for Kentucky Waters.
Step-by-Step Rigging Guide
Alright, let's get down to business and rig this thing up. It's simpler than it sounds, and once you do it a few times, it'll be second nature.
- Thread the Bobber Stop: Take a bobber stop (if it's a string stop, thread your main line through the plastic straw, then slide the knot off the straw onto your line and tighten it down gently but firmly). If it’s a rubber stop, just slide it onto your line. Make sure it's snug.
- Add the Bead: Slide one small plastic bead onto your main line, letting it rest against the bobber stop. This is vital for smooth operation.
- Attach the Slip Bobber: Thread your main line through the bottom eyelet of your slip bobber, then out through the top eyelet. The bobber should now slide freely up and down the line.
- Add Weight: Crimp one or two small split shot sinkers about 6-12 inches above where you'll tie your hook or jig. The exact placement can vary; some prefer it closer to the hook for a faster fall, others higher up for a slower, more natural descent.
- Tie on Your Hook or Jig: Finally, tie your crappie hook (if you're using live bait) or your preferred crappie jig onto the end of your main line using a strong knot like a Palomar or improved clinch knot.
And that's it! Your slip bobber rig is ready to go. You can then adjust the depth by sliding the bobber stop up or down your line, moving the bead and bobber with it, and observing how the weight of your bait pulls the line through the bobber.
Adjusting Depth and Reading the Bite
The beauty of the slip bobber is how easily you can fine-tune your depth. To adjust, simply slide the bobber stop up or down your main line. Sliding it up increases the depth your bait will sink; sliding it down decreases the depth. When you're first starting, or when fishing a new spot, it's often a good idea to start shallower and gradually increase your depth until you find the fish. If you have a fish finder, that's your best friend for quickly identifying where crappie are holding. If not, start with depths around 5-7 feet and work your way deeper, or target visible structure.
Reading the bite on a slip bobber is generally very clear. When a crappie takes your bait, the bobber will usually dip, twitch, or go completely under the water. Sometimes, especially with lighter bites or in windy conditions, it might just lie flat on the water. Because the line slips through the bobber, there's less resistance for the fish, meaning they're more likely to fully commit to the bait. When you see any unusual movement, or if the bobber disappears, don't hesitate! Give a firm, quick hook set. With the slip bobber, you’re often presenting your bait right in their strike zone, so those bites tend to be solid.
Mastering the Slip Bobber Technique on Kentucky Waters
Once you’ve got your rig set up, it’s time to put it to work on Kentucky’s diverse waters. From the flooded timber of Lake Barkley to the riprap banks of the Ohio River, crappie can be found in a variety of habitats, and the slip bobber technique adapts beautifully to many of them.
Presenting Your Bait Effectively
The key to success with any crappie technique, especially with a slip bobber, is presentation. You want your bait to look as natural and enticing as possible. For casting, aim for your desired target – whether it's a brush pile, a dock, or a channel swing. Let your jig or minnow sink naturally, allowing the bobber to slide up the line until it hits your bobber stop. Once it’s at depth, you can let it sit motionless, which is often deadly for crappie, or impart very subtle action. A slight twitch of the rod tip can make your jig dance or your minnow struggle, often triggering a strike.
Drifting is another highly effective method with a slip bobber, especially on larger bodies of water like Kentucky Lake: The State's Top Bass Fishing Destination or Lake Cumberland. Let the wind or current gently push your boat, slowly dragging your slip bobber rig along. The key here is to cover water slowly and methodically, allowing your bait to present itself to any crappie you pass over. Slow trolling, either with an electric trolling motor or by slowly paddling a kayak, also works wonders. This allows you to follow contour lines or submerged creek channels, keeping your bait in the strike zone as you move. Remember, crappie typically prefer a slower presentation, so subtle movements are more often rewarded than aggressive jerking.
Targeting Specific Crappie Habitats
Kentucky is blessed with incredible crappie fisheries, and understanding where these fish like to hang out is crucial. With your slip bobber rig, you can precisely target these areas:
- Brush Piles and Submerged Timber: These are crappie magnets. Use your fish finder or knowledge of the lake to pinpoint these structures. Set your bobber stop to a depth that puts your bait just above the top of the brush pile. This minimizes snags while keeping your offering in the crappie's upward feeding cone. Lakes like Lake Barkley and Kentucky Lake are famous for their extensive crappie habitat in submerged timber.
- Drop-offs and Ledges: Crappie often stage on the edges of sudden depth changes. Cast your slip bobber rig onto the shallower side of the drop-off and let it drift or slowly retrieve it down the slope. Adjust your bobber stop as needed to keep your bait at the desired depth along the ledge. This is particularly effective during cooler months.
- Bridge Pilings and Docks: These man-made structures provide shade, cover, and ambush points. Pitch your slip bobber rig close to the pilings or under dock platforms. The ability to set a precise depth means you can fish right next to the structure without constantly snagging. Many community lakes and even the Ohio River have excellent fishing around these structures.
- Grass Beds and Lilly Pads: In shallower water, especially during the spring spawn, crappie will relate to vegetation. The slip bobber allows you to present your bait just above the top of the weeds, where crappie often hold to ambush baitfish. This is a great way to explore shallow coves and backwaters without getting constantly fouled in the greenery.
Common Mistakes to Avoid
Even with a slip bobber, there are a few pitfalls that can lead to frustration. Being aware of these common mistakes will help you refine your technique and catch more fish.
One frequent error is over-setting the hook. Because the slip bobber offers less resistance to the fish, crappie often take the bait more aggressively. If you rear back with a massive hook set, you might rip the hook right out of their papery mouths. A firm, upward sweep of the rod tip is usually all that’s needed. Another common mistake is using too heavy a weight. An excessive amount of split shot can make your bait fall unnaturally fast and also make the bobber too sensitive, signaling false bites. Use just enough weight to get your bait down and keep your line relatively taut. If your bobber is barely floating or seems pulled under, you likely have too much weight.
Choosing the wrong bobber size is another issue. Too large, and it creates too much resistance. Too small, and it won't support your bait, or you won't see the bites. Match the bobber to your bait and conditions. Finally, and perhaps most importantly, not adjusting your depth. Crappie move! Just because they were at 8 feet yesterday doesn't mean they'll be there today. Be proactive in adjusting your bobber stop, especially if you're not getting bites. Experiment with depths every 15-20 minutes until you find the fish again. The beauty of the slip bobber is its adjustability, so don't be afraid to use it! If you're struggling to locate them, a good strategy might be to consult guides like How to Find Crappie in Deep Water in Summer or Best Depth to Fish for Crappie in Spring depending on the season.
Advanced Tips and Seasonal Considerations
As you become more comfortable with the slip bobber, you’ll start to appreciate its versatility. It’s not just a tool for precise depth; it’s a foundational technique that can be adapted to various baits and seasonal patterns throughout Kentucky.
Pairing with Different Baits and Jigs
The slip bobber is incredibly effective with a variety of crappie baits. For many anglers, the classic pairing is a live minnow on a small Aberdeen hook. The minnow's natural movements under the bobber are often irresistible to crappie, and the slip bobber allows it to swim freely at a precise depth. You can often find live minnows at local bait shops across Kentucky, or even purchase a minnow bucket on Amazon if you're planning an extended trip.
However, don't limit yourself to live bait! Small soft plastic jigs, like a tiny tube jig or a micro grub, rigged on a 1/32 or 1/16 oz jig head, work exceptionally well. The slip bobber allows these artificial lures to suspend enticingly. You can use a very slow retrieve or gentle twitches to impart action, making them flutter and dart like a distressed baitfish. Hair jigs, especially in colder water, can also be deadly when fished under a slip bobber, offering a subtle, life-like presentation that crappie often can't resist. Experiment with different colors and sizes based on water clarity and crappie preferences on your specific lake.
Seasonal Adjustments for Crappie Depth
Crappie behavior, and thus their preferred depth, changes significantly throughout the year, especially here in Kentucky with our distinct seasons. Understanding these patterns will greatly improve your success with a slip bobber.
- Spring (Pre-spawn and Spawn): This is often the shallowest crappie fishing of the year. As water temperatures rise, crappie move into shallow coves, creek arms, and around submerged brush or docks to spawn. During this time, you might be setting your slip bobber to just 2-5 feet deep. Look for these fish in water around 55-65 degrees Fahrenheit. This is prime time for the Kentucky Crappie Fishing: Spring Spawn Run Guide, and your slip bobber can be invaluable for presenting baits precisely in these shallow, cover-laden areas.
- Summer: Once the spawn is over and water temperatures really heat up, crappie often move to deeper, cooler water. They'll typically suspend over submerged brush piles, channel swings, and around thermoclines in 10-25 feet of water. Your slip bobber will be essential for reaching these depths and keeping your bait suspended just above the fish. Look for crappie to relate to deeper structure and shade.
- Fall: As water temperatures begin to cool, crappie often become more active and start to feed aggressively, putting on weight for winter. They might be found anywhere from 5-15 feet, often moving between deeper structure and shallower feeding flats. The fall bite can be fantastic, and a slip bobber allows you to quickly adjust to their preferred depth as they roam.
- Winter: During the coldest months, crappie generally hold in deeper water, often suspending over deep channels, large brush piles, or around main lake points. You might be targeting depths of 20-40 feet or more. A slip bobber is crucial here for accurately presenting your bait to these lethargic, deep-holding fish. While the bite can be slow, the fish caught are often large and healthy.
Maintaining Your Gear
Good maintenance isn't just about preserving your investment; it's about ensuring your gear performs flawlessly when that trophy crappie bites. Always check your knots before and during your fishing trip. A frayed line or a weak knot is a recipe for heartbreak. The knot you use to tie your hook or jig is critical, but don't forget the knot on your bobber stop – ensure it's tight and secure.
Keep your fishing line in good condition. Monofilament can develop memory and coil, especially if left on the reel for too long. If you notice excessive coiling or abrasions, it might be time to respool, especially if you're using very light line, which is often recommended for crappie fishing to detect those subtle bites. Finally, store your slip bobbers properly. Many come with small plastic cases or you can simply keep them in a compartment in your tackle box. This prevents them from getting crushed or damaged, ensuring they're ready for your next outing on the water. Proper care for your gear, including your Best Rods and Reels for Kentucky Crappie Fishing, will translate directly into more successful and enjoyable days on Kentucky's lakes and rivers.
| Feature | Slip Bobber | Fixed Bobber |
|---|---|---|
| Depth Control | Highly adjustable to any depth | Fixed to a specific, shallow depth |
| Casting Distance | Excellent, reels down to rod tip | Limited, becomes tangled with deep settings |
| Bite Sensitivity | High, less resistance for fish | Moderate, more resistance for fish |
| Depth Range | Ideal for deep water (8+ feet) or changing depths | Best for shallow water (under 8 feet) |
| Versatility | Excellent for various presentations and depths | Limited to static, shallow presentations |
| Setup Complexity | Slightly more components and steps | Very simple, fewer components |
| Snag Potential | Lower, bait can be suspended above structure | Higher, bait depth is less precise near cover |
Disclaimer
Fishing regulations, including license requirements, bag limits, and size restrictions, can change. Always consult the most current Kentucky Department of Fish and Wildlife Resources regulations before heading out on your fishing trip. The information provided in this guide is for general informational purposes only and should not be considered legal advice.