Fish Finders and GPS for Kentucky Lake and Lake Barkley
Fishing on vast, intricate reservoirs like Kentucky Lake and Lake Barkley can feel like searching for a needle in a haystack, especially when you're trying to locate those elusive fish or navigate unfamiliar waters safely. It's a common frustration to spend hours casting without a bite, or feeling lost on seemingly endless expanses. This comprehensive guide is here to demystify fish finders and GPS units, showing you how these crucial electronics can transform your experience, helping you pinpoint productive fishing spots and navigate Kentucky's big waters with confidence.
Why Fish Finders and GPS are Game-Changers on Kentucky Lake and Lake Barkley
Let's be real, Kentucky Lake and Lake Barkley aren't your average farm ponds. These are massive bodies of water, covering tens of thousands of acres with intricate shorelines, submerged structures, and constantly changing conditions. Trying to fish them effectively without modern electronics is like trying to find your way through a dense forest without a compass or map – you might get lucky, but you'll probably spend more time lost and frustrated than actually finding what you're looking for. These tools aren't just fancy gadgets; they're essential for safety, efficiency, and consistent angling success on such grand scales.
Navigating Expansive Waters Safely and Efficiently
Imagine heading out onto Kentucky Lake at dawn, the fog still hugging the surface, and trying to remember exactly where that productive creek channel was yesterday. Or perhaps you’re on Lake Barkley, cruising across a wide bay, and suddenly you're not entirely sure which cove leads back to your ramp. These are real scenarios where a reliable GPS unit becomes your best friend. It’s not just about knowing where you are; it’s about knowing where you're going and, more importantly, how to get back safely.
With a GPS on board, you can mark hazards like submerged stumps or shallow rock piles, ensuring you avoid them on future trips. You can save your boat ramp location, making sure you don't waste precious fishing time trying to navigate back in low light or changing weather. On waters like these, covering hundreds of miles of shoreline, having that clear, real-time map showing your position and direction is an absolute necessity, providing peace of mind so you can focus on the fishing, not on getting lost. It also helps you get to those prime fishing spots mentioned in guides like Best Bass Fishing Spots on Kentucky Lake without circling endlessly.
Locating Productive Fish Structure and Schools
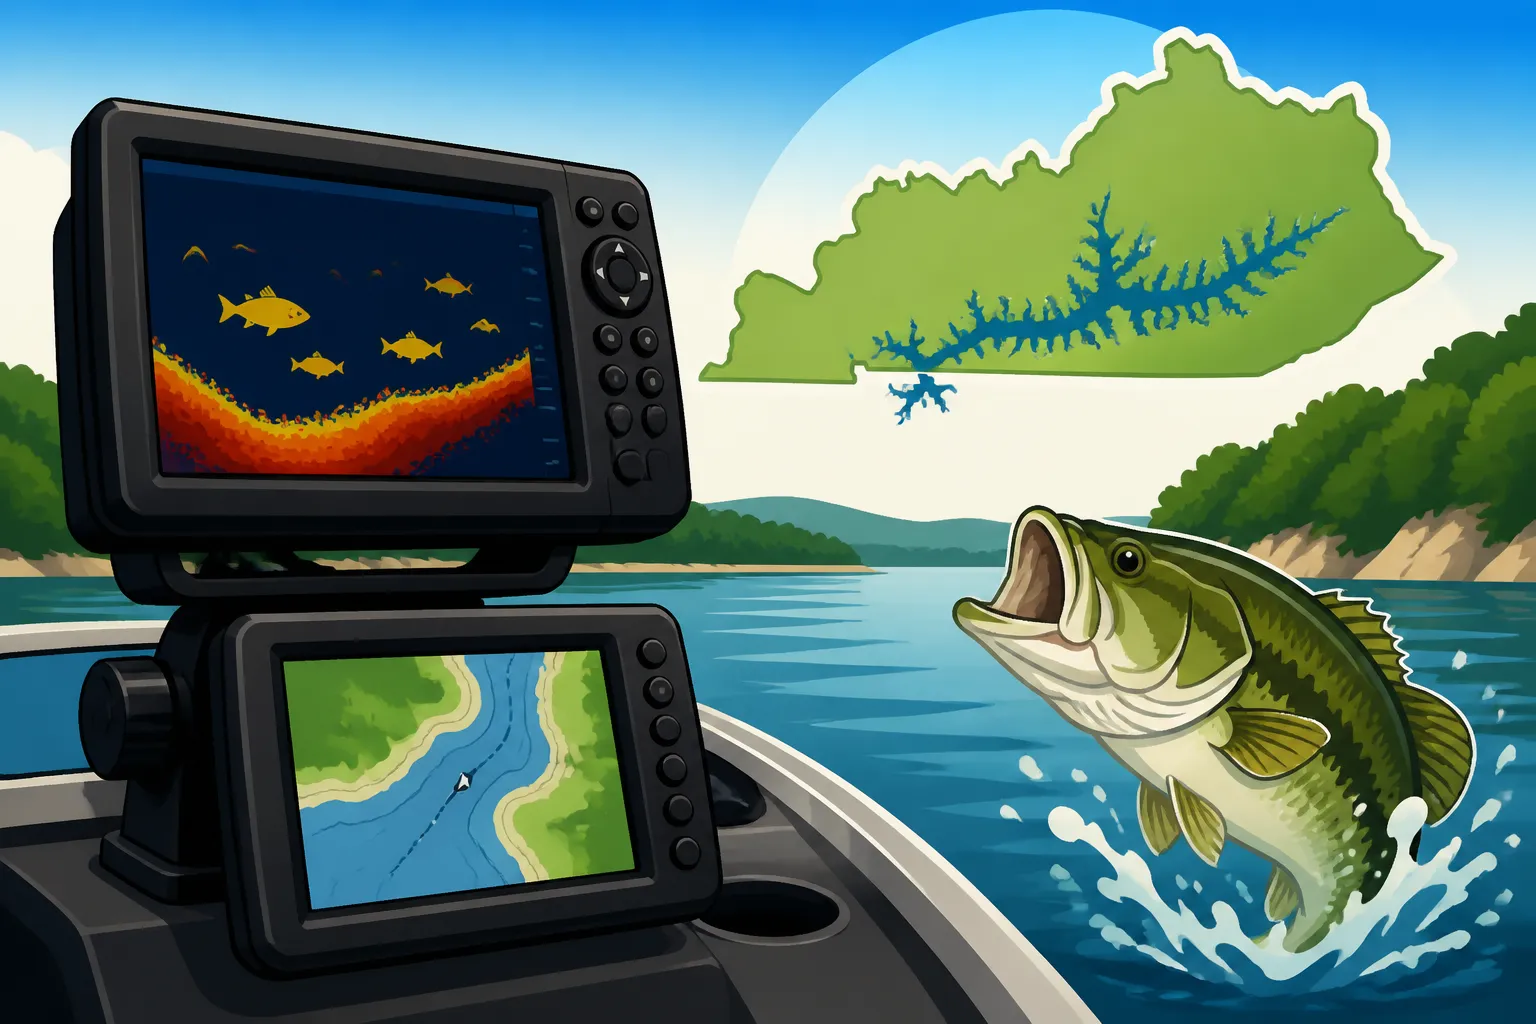
Fish, especially species like bass, crappie, and catfish, are intimately tied to structure and depth changes. On a lake as vast as Kentucky Lake, knowing where those submerged humps, brush piles, ledges, and creek channels are located is paramount. You can't just randomly cast and expect to hit paydirt. This is where your fish finder truly shines. It allows you to "see" beneath the surface, identifying the contours of the lake bottom, detecting cover, and, most excitingly, marking schools of baitfish and the predators that lurk nearby.
Think about idling over a known crappie hole on Lake Barkley. Without a fish finder, you’re just dropping lines hoping to hit the sweet spot. With one, you can see if the crappie are actually present, what depth they're holding at, and whether they're relating to a submerged tree or a hard bottom contour. This takes the guesswork out of the equation, allowing you to present your bait precisely where the fish are, drastically increasing your chances of a successful day.
Enhancing Efficiency and Reducing Guesswork
Every angler knows that time on the water is precious. We don't want to spend half the day searching for fish or trying to figure out if a spot is even worth fishing. Fish finders and GPS units are incredible time-savers. Instead of blindly prospecting, you can quickly scan an area, identify promising structure or fish concentrations, and move on if nothing looks good. This efficiency means more actual fishing time and less frustration.
For instance, if you're targeting bass during the spring spawn, you might be looking for shallow transition areas near deep water. Your electronics can help you quickly identify these depth changes, submerged cover, and even warmer water pockets that bass might prefer. This ability to eliminate unproductive water and focus on high-potential areas is invaluable, especially when you're trying to make the most of a short trip or adapt to changing conditions throughout the day, as discussed in Kentucky Fishing Seasons: What to Catch Each Month. It allows you to be more tactical and less reliant on sheer luck.
Understanding Different Types of Fish Finder Technologies
The world of fish finders has evolved dramatically, moving far beyond simple depth finders. Today's units offer a dazzling array of technologies designed to give you an unparalleled view of the underwater world. Understanding these different types is crucial for choosing the right system for your fishing style on Kentucky's major lakes.
Sonar Basics: 2D, Down Imaging, and Side Imaging
These are the foundational technologies you’ll find in most modern fish finders, and each provides a unique perspective.
- 2D Sonar (Traditional Sonar): This is the classic "fish arch" view most people associate with fish finders. It sends a conical beam of sound waves straight down, interpreting echoes to show depth, bottom composition, and fish as arches or blobs. While it might seem basic, a good 2D sonar is incredibly useful for finding fish under the boat and understanding general depth contours. It's excellent for marking schools of baitfish in the water column or seeing a tight group of crappie holding to a brush pile directly beneath you. Its strength lies in its ability to show what's moving through the cone and its ease of interpretation once you get the hang of those arches.
- Down Imaging (or DownVu/DownScan): This technology uses a very narrow, high-frequency beam that essentially gives you a photographic-like image of what's directly below your boat. Instead of arches, you'll see more defined images of submerged trees, rock piles, ledges, and even individual fish as distinct shapes. It's fantastic for dissecting specific pieces of structure and truly understanding what's there. On a lake like Barkley, where brush piles and old creek beds hold a lot of fish, Down Imaging can show you the intricate details of that cover, making it easier to place your lure right in the strike zone.
- Side Imaging (or SideVu/SideScan): Now, this is where things get really interesting, especially on vast waters. Side Imaging sends beams out to the left and right of your boat, scanning a wide swath of the bottom. This allows you to literally "see" structure, cover, and fish well off to the sides, without having to drive directly over them. Imagine idling down a channel on Kentucky Lake, and being able to scan hundreds of feet to either side, spotting hidden stumps, rock formations, or even submerged boat ramps that you never knew were there. This capability is revolutionary for finding new spots quickly and efficiently, covering massive areas in a fraction of the time it would take with just 2D sonar. It’s perfect for pinpointing those isolated brush piles that hold big bass.
CHIRP Sonar for Enhanced Clarity and Target Separation
CHIRP stands for Compressed High-Intensity Radiated Pulse, and it's a significant upgrade over traditional single-frequency sonar. Instead of sending out one single ping, CHIRP technology sends a continuous sweep of frequencies, from low to high, providing much more data to the receiver. This results in several key benefits for anglers.
Firstly, superior target separation. With CHIRP, you can distinguish individual fish within a school, or even see a fish holding tight to a piece of cover that might otherwise blend in. This means you can tell the difference between a bait ball and a large game fish sitting right next to it. Secondly, reduced noise and interference, giving you a much cleaner, clearer image on your screen, especially in deeper water. This improved clarity helps you interpret what you're seeing more accurately, reducing frustration from fuzzy or unreliable readings. Many high-end units available at places like Bass Pro Shops will feature CHIRP sonar, offering an undeniable advantage for serious anglers on Kentucky's challenging waters.
Live Sonar Systems for Real-Time Views
This is the cutting edge of fish finder technology and has completely changed how many professional and amateur anglers approach fishing. Brands like Garmin (with LiveScope), Lowrance (with ActiveTarget), and Humminbird (with Mega Live Imaging) offer systems that provide real-time, video-game-like views of fish and your lure in the water. Instead of seeing historical data or static images, you can actually watch fish swim, react to your bait, and even see your lure as it falls through the water column.
Imagine being on Lake Barkley, dropping a jig down, and watching on your screen as a school of crappie moves towards it, or seeing a big bass dart out from a brush pile to investigate your offering. This allows for immediate adjustments to your presentation, depth, or retrieve speed, drastically increasing your hook-up ratio. While these systems represent a significant investment, their ability to show you exactly what's happening right now beneath your boat is unparalleled, making them an incredible tool for vertical jigging, ice fishing (if conditions allow in Kentucky), or even casting to visible targets.
GPS Features and Navigation on Big Water
While finding fish is often the primary goal, navigating safely and effectively on expansive waters like Kentucky Lake and Lake Barkley is equally important. Modern GPS units integrated into your fish finder provide a wealth of navigational tools that go far beyond simply knowing where you are.
Chartplotters and Detailed Mapping Features
A chartplotter is essentially a GPS unit that displays nautical charts and detailed maps on its screen. For Kentucky Lake and Lake Barkley, these maps are invaluable. They often include:
- Detailed Lake Contours: High-definition contour lines that show depth changes, ledges, humps, and drop-offs. These are crucial for identifying prime fish-holding structure that you can then investigate with your sonar. You can see steep channel banks, points, and flats, giving you a comprehensive understanding of the underwater topography.
- Navigation Aids: Marker buoys, river channels, and sometimes even danger zones are marked on these charts, helping you stay in safe water and avoid potential hazards. This is particularly important on riverine lakes like the Kentucky-Barkley system, where old river channels are key.
- Shallow Water Warnings: Many units allow you to set a "shallow water alarm" that alerts you if you're approaching depths shallower than a pre-set value, preventing costly encounters with stumps or sandbars, especially when cruising at higher speeds.
Having these detailed maps allows you to plan your fishing trip strategically. You can scout potential areas from the comfort of your home, mark them, and then navigate directly to them on the water. This saves immense amounts of time and makes you a much more efficient angler.
Waypoints and Routes: Marking Your Hot Spots
This is perhaps one of the most powerful features of a good GPS unit for anglers. A waypoint is simply a saved geographical coordinate. When you find a productive fishing spot – whether it’s a brush pile where you caught a limit of crappie, a submerged road bed holding bass, or a particularly gnarly stump field – you can mark it with a waypoint. The beauty of this is that you can then return to that exact spot with incredible precision, often within a few feet, on your next trip or even next year.
Routes allow you to connect multiple waypoints, creating a navigation path. This is useful for:
- Replicating Productive Drifts: If you had a successful drift over a particular structure, you can mark waypoints along that drift and create a route to repeat it accurately.
- Safe Passage: Setting up a route from the boat ramp to your favorite fishing grounds, navigating around known hazards, ensures you have a clear, safe path to follow every time.
- Exploring New Areas: You can pre-plan a route to explore a new section of the lake, hitting specific points of interest you've identified on your charts.
The ability to save and revisit these crucial spots is what turns a random encounter into a repeatable pattern. It's how experienced anglers build up their "milk runs" of reliable fishing locations over time. When you find a spot that produces, whether it's for the Kentucky Statewide Bass Size and Daily Limit Rules or a mess of crappie, marking it on your GPS is non-negotiable.
Understanding GPS Accuracy and Reliability
While GPS is incredibly accurate today, it's good to understand the factors that can affect its reliability on the water. Modern GPS receivers generally offer accuracy within a few meters, sometimes even better with augmentation systems. However, factors like dense tree cover (if you're very close to shore in a narrow creek), severe weather, or even older unit technology can slightly reduce precision.
For the most reliable signal, especially on larger boats, some anglers opt for an external GPS antenna. This antenna is typically mounted in an unobstructed location, giving the receiver a clearer view of the sky and the satellites. Most integrated units are highly reliable on their own, but if you experience intermittent signal loss or accuracy issues, an external antenna might be worth considering. Always ensure your unit has a clear view of the sky when possible for optimal performance.
Key Features to Look for in a Fish Finder/GPS Combo
Choosing the right fish finder and GPS combination can feel daunting with so many options out there. It’s not just about getting the most expensive unit; it’s about finding the best fit for your fishing style, your boat, and your budget, especially when you consider the unique demands of fishing Kentucky Lake or Lake Barkley.
Screen Size and Display Quality
This is often the first thing people notice, and for good reason. A larger screen makes a huge difference in how easily you can interpret the information. Imagine trying to decipher intricate Side Imaging details or follow a tight contour line on a tiny, low-resolution screen while your boat is bouncing on choppy water. It's incredibly frustrating.
- Screen Size: For serious fishing on big water, aiming for at least a 7-inch display is a good starting point. Many experienced anglers prefer 9-inch, 10-inch, or even larger units, especially if they plan to run split screens (e.g., 2D sonar on one side, Side Imaging on the other, and GPS map on a third). Larger screens reduce eye strain and allow for more detail.
- Resolution: Don't just look at screen size; check the resolution (e.g., 800×480 pixels, 1024×600 pixels). Higher resolution means a sharper, clearer image with more detail, which is critical for distinguishing fish from structure, particularly when using advanced imaging modes.
- Sunlight Readability: This is crucial. Some screens wash out completely in bright sunlight, making them useless. Look for units with bright, high-contrast displays designed for outdoor use. Many brands, like those found at Bass Pro Shops or on Amazon, will highlight their screen technology for this very reason.
Transducer Selection: The Eyes of Your System
The transducer is arguably the most important part of your fish finder, as it's the component that sends and receives the sonar signals. A poor transducer will give you poor readings, no matter how good your head unit is.
-
Types:
- Transom Mount: The most common and easiest to install, typically clamped or screwed to the boat's transom. Good for most recreational fishing.
- Thru-Hull: Drilled through the bottom of the boat, offering excellent performance, especially at speed, but requires more invasive installation. Often preferred for larger, faster boats.
- Shoot-Thru-Hull: Mounted inside the hull, shooting through the fiberglass. Offers protection from damage but can experience some signal loss. Good for boats where drilling a thru-hull is undesirable.
- Trolling Motor Mount: Specifically designed to attach to the shaft of a trolling motor, giving you sonar where your motor is pointed, which is excellent for detailed scanning around cover or following contours.
-
Frequencies: Different frequencies are better for different tasks:
- Low Frequencies (e.g., 50 kHz): Better for deep water penetration but less detail.
- High Frequencies (e.g., 200 kHz, 455 kHz, 800 kHz, 1.2 MHz): Better for detail and target separation, especially in shallower to moderate depths, which is where a lot of productive fishing happens on Kentucky Lake and Lake Barkley. Modern CHIRP transducers often use a wide range of frequencies for the best of both worlds.
Ensure the transducer you select is compatible with your head unit and suitable for the depths and fishing conditions you anticipate. If you're looking for Best Boats for Kentucky Lake and Lake Barkley Fishing, consider the transducer options that pair well with different boat types.
Budget vs. Features: Finding Your Sweet Spot
Let's face it, fishing electronics can be a significant investment. You can spend a few hundred dollars on an entry-level unit or several thousand on a top-tier system with all the bells and whistles. The key is to find the right balance for your needs.
- Entry-Level (under $500): You'll typically get a smaller screen (5-7 inches), good 2D sonar, and basic GPS with mapping. These are excellent for smaller boats, casual anglers, or those on a tighter budget who still want a significant upgrade from no electronics.
- Mid-Range ($500 – $1500): This is where you start getting into larger screens (7-9 inches), CHIRP 2D sonar, Down Imaging, Side Imaging, and more advanced mapping. Many anglers find this range offers the best value for performance, providing a comprehensive suite of tools for serious fishing on Kentucky's big lakes.
- High-End ($1500+): These units offer the largest, highest-resolution screens (9-16+ inches), often touch-screen functionality, network capabilities (allowing multiple units to share data), and cutting-edge technologies like Live Sonar. This is the realm of competitive anglers or those who simply want the absolute best technology available.
Consider what features are truly essential for your fishing style. If you primarily fish shallow cover, perhaps advanced Side Imaging is more critical than ultra-deep 2D sonar. If you're a tournament angler, investing in Live Sonar might give you a competitive edge. It's often smart to prioritize the best sonar and GPS for your budget from reputable brands like Humminbird, Lowrance, or Garmin.
Setting Up and Using Your Electronics Effectively
Even the best fish finder and GPS system won't do you much good if it's not set up correctly or if you don't know how to interpret what it's telling you. Proper installation and understanding the settings are just as important as the technology itself.
Proper Transducer Mounting and Wiring
The transducer is the "eye" of your fish finder, and its placement is critical for clear, accurate readings. Many common issues with fish finders, like fuzzy screens or lost bottom readings at speed, stem from improper transducer installation.
- Placement for Transom Mounts: The transducer should be mounted as close to the center of the transom as possible, in an area free from turbulence created by the hull, motor, or other boat accessories. It needs to be low enough to be fully submerged at all speeds, but not so low that it creates excessive spray or is prone to damage when trailering or launching. Ideally, the bottom of the transducer should be slightly below the hull line. A common mistake is mounting it too high or in turbulent water, leading to "cavitation" where air bubbles interfere with the sonar signal.
- Wiring: Always use marine-grade wiring and connectors. Ensure all connections are secure, waterproof, and protected from corrosion. Run power cables directly to the battery or a dedicated marine fuse panel to avoid interference from other electronics on the boat. Having a clean, dedicated power supply is crucial for optimal performance, preventing issues like flickering screens or intermittent power loss that can ruin a day of fishing. This attention to detail will help you make the most of your investment, whether you picked up your unit from Amazon or your local Bass Pro Shops.
Powering Your Electronics and Managing Batteries
Modern fish finders, especially those with large screens and advanced sonar, can draw a fair amount of power. For a day on the water, you need to ensure your battery system can handle the load.
- Dedicated Battery: Many anglers running multiple large screens and high-powered live sonar systems opt for a dedicated deep-cycle battery solely for their electronics. This isolates the electronics from the starting battery, preventing issues where running your fish finders all day might drain your cranking battery and leave you stranded.
- Battery Capacity: Consider the amp-hour (Ah) rating of your battery. The higher the Ah, the longer it can power your electronics. If you fish long days or run multiple power-hungry units, a higher capacity battery is a must.
- Wiring and Fusing: Always run properly sized wires for the current draw of your units and install appropriate in-line fuses to protect your equipment and prevent electrical fires. Consult your unit's manual for recommended wire gauges and fuse sizes. This is an important part of overall Kentucky Boating Safety Gear Checklist.
Customizing Settings for Optimal Views
Out of the box, your fish finder will have default settings, but to truly maximize its performance, you need to learn to adjust them to specific conditions.
- Sensitivity/Gain: This controls how strong the sonar returns are displayed. Too low, and you'll miss faint targets; too high, and you'll get clutter and noise. Adjusting it to just below the point where you see excessive noise is usually optimal. In murky water, you might need to increase sensitivity; in clear water, you might dial it back.
- Range/Depth Scale: Set your depth range to slightly deeper than the water you're fishing. This spreads out the returns on the screen, making them easier to see. If you're in 20 feet of water, a 30-foot range might be better than a 100-foot range.
- Scroll Speed: This controls how quickly the sonar history scrolls across the screen. A faster scroll speed can be better for identifying individual fish or subtle changes when moving quickly, while a slower speed can give you a more compressed view over longer distances.
- Color Palettes: Most units offer various color schemes. Experiment with them! Different color palettes can make it easier to distinguish between bottom hardness, fish, and structure under various lighting conditions. Some anglers prefer darker backgrounds for low light, while others like brighter ones for direct sunlight.
- Noise Rejection/Surface Clutter: These settings help filter out unwanted noise from the surface (wave action, air bubbles) or other sources, providing a cleaner image of the water column.
Taking the time to learn and tweak these settings will make a huge difference in how clearly you "see" the underwater world and ultimately, how successful you are at finding fish. It's an ongoing process as conditions change, but it pays off tremendously.
Essential Tips for Big Water Anglers
Having the right gear is only half the battle; knowing how to use it effectively on a body of water as complex as Kentucky Lake or Lake Barkley is the other. Developing a systematic approach to using your fish finder and GPS will greatly enhance your success.
Interpreting Your Screen: What to Look For
Your fish finder is constantly painting a picture of the underwater world, but you need to know how to read it. It's not always about clear fish arches; sometimes, the subtle details tell the biggest story.
- Fish Arches vs. Blobs: On 2D sonar, a solid, well-defined arch usually indicates a fish. The thickness of the arch can give you a clue about the size of the fish, while its position (e.g., higher in the water column, tight to the bottom) tells you where it's holding. Sometimes fish appear as simple blobs, especially if they're moving slowly or if your boat isn't directly over them.
- Structure Definitions: Pay close attention to the bottom contour. Is it flat? Does it have subtle bumps (humps) or sharp drop-offs (ledges)? Look for irregularities. On Down and Side Imaging, learn to identify distinct shapes: a Christmas tree-like shape often indicates a brush pile, while jagged returns might be rock piles or stumps.
- Bait Balls: Large, dense clouds of scattered dots or irregular shapes are typically schools of baitfish. Where there's bait, there are usually predators. Finding these bait balls is a huge clue to where game fish like bass and crappie might be feeding.
- Thermoclines: In summer, large lakes often develop a thermocline – a distinct layer where water temperature changes rapidly. Many species of fish will hold just above or below this layer. Your 2D sonar can often reveal this as a faint, diffuse line across the screen.
- Bottom Hardness: A thick, bright bottom return usually indicates a hard bottom (rock, gravel), while a thinner, softer return suggests mud or silt. Different fish prefer different bottom types, and this can be a key piece of information.
Learning to interpret all these clues together will give you a much better understanding of the ecosystem beneath your boat. Check out How to Read a Fish Finder for Bass Fishing for even more in-depth tips on this skill.
Combining Sonar and GPS for Tactical Advantage
The true power of modern electronics comes from using your fish finder and GPS in tandem. They are designed to complement each other, providing a holistic view of the fishing environment.
-
Finding a Spot, Marking It, Returning to It:
- Search with Side Imaging: Begin by slowly cruising a promising area, using Side Imaging to scan wide swaths of water for structure, cover, or baitfish activity. You're essentially "mowing the lawn" underwater.
- Verify with Down Imaging/2D: Once Side Imaging reveals something interesting (a brush pile, a school of fish), turn your boat and idle directly over it, using Down Imaging and 2D sonar to get a clearer, more detailed view. Confirm it's what you think it is and that fish are actually present.
- Mark with GPS: Immediately mark that precise location with a GPS waypoint. Give it a descriptive name (e.g., "Crappie Brush Pile 1," "Bass Ledge SW").
- Fish the Spot: Now you know exactly where to cast, drop your lure, or deploy your trolling motor.
- Return Later: If the spot produces, your waypoint ensures you can return to it again and again, even in different weather or light conditions. This systematic approach is invaluable for building a mental library of productive locations, much like those explored in Best Fishing Spots Near Louisville, Kentucky.
-
Following Contours and Depth Lines: Use your GPS chartplotter with high-definition contour maps to follow specific depth lines where fish are known to hold. For example, in the summer, bass might relate to a 20-foot depth contour on a main lake point. You can set your GPS to show you that specific contour line, then use your trolling motor to follow it precisely, while your sonar monitors for fish and structure along that path. This is a far more effective method than trying to guess your depth or navigate visually.
Software Updates and Unit Care for Longevity
Like any piece of sophisticated electronics, your fish finder and GPS unit benefit from regular care and maintenance. This isn't just about keeping it clean; it's about keeping it performing at its best.
- Software Updates: Manufacturers frequently release software updates for their units. These updates often include performance improvements, bug fixes, new features, or updated mapping data. Make it a habit to periodically check the manufacturer's website (e.g., Lowrance, Humminbird, Garmin) for the latest software. Updating is usually a simple process of downloading the file to an SD card and inserting it into your unit. Staying current ensures you're getting the best performance and functionality your unit has to offer.
- Physical Care:
- Cleaning: After each trip, wipe down your unit's screen and housing with a damp, soft cloth to remove water spots, dirt, and sunscreen residue. Avoid harsh chemicals that can damage the screen coating.
- Screen Protectors: Consider adding a screen protector. They are inexpensive and can prevent scratches and damage, especially in a rugged boat environment.
- Covers: When not in use, always cover your unit with its protective cover. This shields it from UV rays, dust, and accidental bumps.
- Transducer Inspection: Periodically inspect your transducer for any damage, marine growth, or debris. A clean transducer provides the clearest signal.
- Storage: If you remove your units for storage, keep them in a cool, dry place away from extreme temperatures.
By taking these steps, you're not just protecting your investment; you're ensuring that your fish finder and GPS will reliably serve you for many seasons to come, helping you unlock the incredible fishing potential of Kentucky Lake and Lake Barkley. Whether you're chasing crappie in the spring, or bass in the fall, reliable electronics are a cornerstone of a successful trip.
| Feature / Technology | Best Use Case on Kentucky Lake/Lake Barkley | Key Benefit | Considerations |
|---|---|---|---|
| 2D Sonar | General depth finding, identifying fish arches, bait balls under boat. | Reliable, good for tracking fish beneath the boat. | Less detail on structure than imaging. |
| Down Imaging | Detailed views of submerged brush piles, ledges, stumps directly below boat. | "Photo-like" clarity of structure and fish. | Only shows what's directly beneath. |
| Side Imaging | Scanning wide areas for hidden structure, brush, humps off to the sides. | Covers vast areas quickly, finds new spots. | Requires practice to interpret effectively. |
| CHIRP Sonar | All sonar types, enhancing clarity and target separation across depths. | Cleaner images, better distinction between fish and cover. | Often included in mid-to-high range units. |
| Live Sonar | Real-time interaction: watching fish react to bait, precise lure placement. | Unprecedented real-time feedback, immediate adjustments. | Higher cost, can be power-intensive. |
| GPS Chartplotter | Navigation, marking waypoints, following contours, avoiding hazards. | Keeps you safe, efficient, and on target. | Needs detailed maps (often purchased separately or included). |
Disclaimer
This article is for general informational purposes only and does not constitute professional advice. Laws, prices and regulations vary by location and change over time. Consult a qualified professional for guidance on your specific situation.