How to Tie a Fishing Knot for Beginners
There's nothing quite as frustrating for an angler as feeling that tell-tale tug, setting the hook perfectly, and then… nothing. Your line comes back, your lure is gone, and you know exactly why: a knot that failed you. For beginners especially, the world of fishing knots can seem daunting, but mastering a few essential ones is foundational to successful and enjoyable days on Kentucky's beautiful lakes and rivers. This guide is here to walk you through the most crucial knots for new anglers, making sure your next big catch doesn't become "the one that got away" because of a flimsy tie.
The Underrated Importance of a Strong Knot
You can have the fanciest rod, the smoothest reel, and the most tantalizing bait, but if your knot isn't tied correctly, it's all for naught. A weak knot is literally the weakest link in your entire fishing setup, and it's almost always the first point of failure when a fish pulls hard or your line snags. It's not just about losing a fish; it's about losing confidence, losing expensive lures, and quite frankly, losing a bit of your patience. Trust me, we've all been there, staring at a frayed line thinking, "If only…"
Imagine hooking into a beautiful largemouth bass on Kentucky Lake or a feisty crappie on Lake Barkley. Your heart is pounding, the rod is bent, and then snap. Just like that, the fish is gone, and you're left with an empty feeling. More often than not, that snap wasn't the line breaking in the middle, but rather the knot at your hook or lure coming undone or breaking under stress. Learning to tie a strong, reliable knot provides the peace of mind that when you do get a bite, your gear will hold up its end of the bargain.
Why Knots Fail and How to Spot the Signs
Knots fail for a few primary reasons, and understanding them is the first step toward preventing them. The most common culprit is improper tying – not enough wraps, loops not seated correctly, or the knot simply being tied incorrectly from the start. This can lead to the knot slipping under pressure, essentially unraveling itself until your lure floats off into the abyss.
Another big reason for knot failure is line damage, often caused by friction when the knot is cinched down too quickly or without lubrication. When you pull a knot tight, especially with monofilament or fluorocarbon lines, the friction can generate heat. This heat can actually weaken the line material, making it brittle and prone to breaking. You might not see it, but microscopic damage is done, creating a weak spot. Always wet your knot with a little saliva before cinching it down slowly and firmly. This lubrication reduces friction and heat, allowing the knot to seat properly without damaging the line. Keep an eye out for frayed or discolored areas near your knot after a tough fight or a snag – those are clear signs of damage.
Beyond Just Holding On: Knot Impact on Lure Presentation
While strength is paramount, a good knot also contributes to how your lure behaves in the water. Some knots, like the Rapala knot (which we won't cover in depth for beginners but is good to know exists), are designed to give your lure a little more freedom of movement, allowing it to swim more naturally. For a beginner, though, the focus should be on clean, compact knots that don't interfere with the lure's action. A bulky, sloppy knot can make a lure swim strangely, making it less appealing to fish.
Furthermore, a well-tied knot is often smaller and less visible. Fish, especially in clearer waters, can be surprisingly wary of anything that looks unnatural. A discreet knot, properly tightened and trimmed, can make all the difference when targeting finicky fish. Think about tying on a small jig for crappie; a huge knot could make that tiny bait seem off. Getting your Tackle Box Setup for Bass and Crappie just right includes paying attention to these small details.
Essential Knots Every Beginner Should Master
Let's dive into the knots that will form the backbone of your fishing repertoire. These aren't the only knots out there, but they are incredibly versatile, relatively easy to learn, and provide excellent strength for most common fishing scenarios you'll encounter in Kentucky. Practice these at home with some thicker rope or string before you even hit the water – it makes a huge difference!
Improved Clinch Knot: Your Go-To for Terminal Tackle
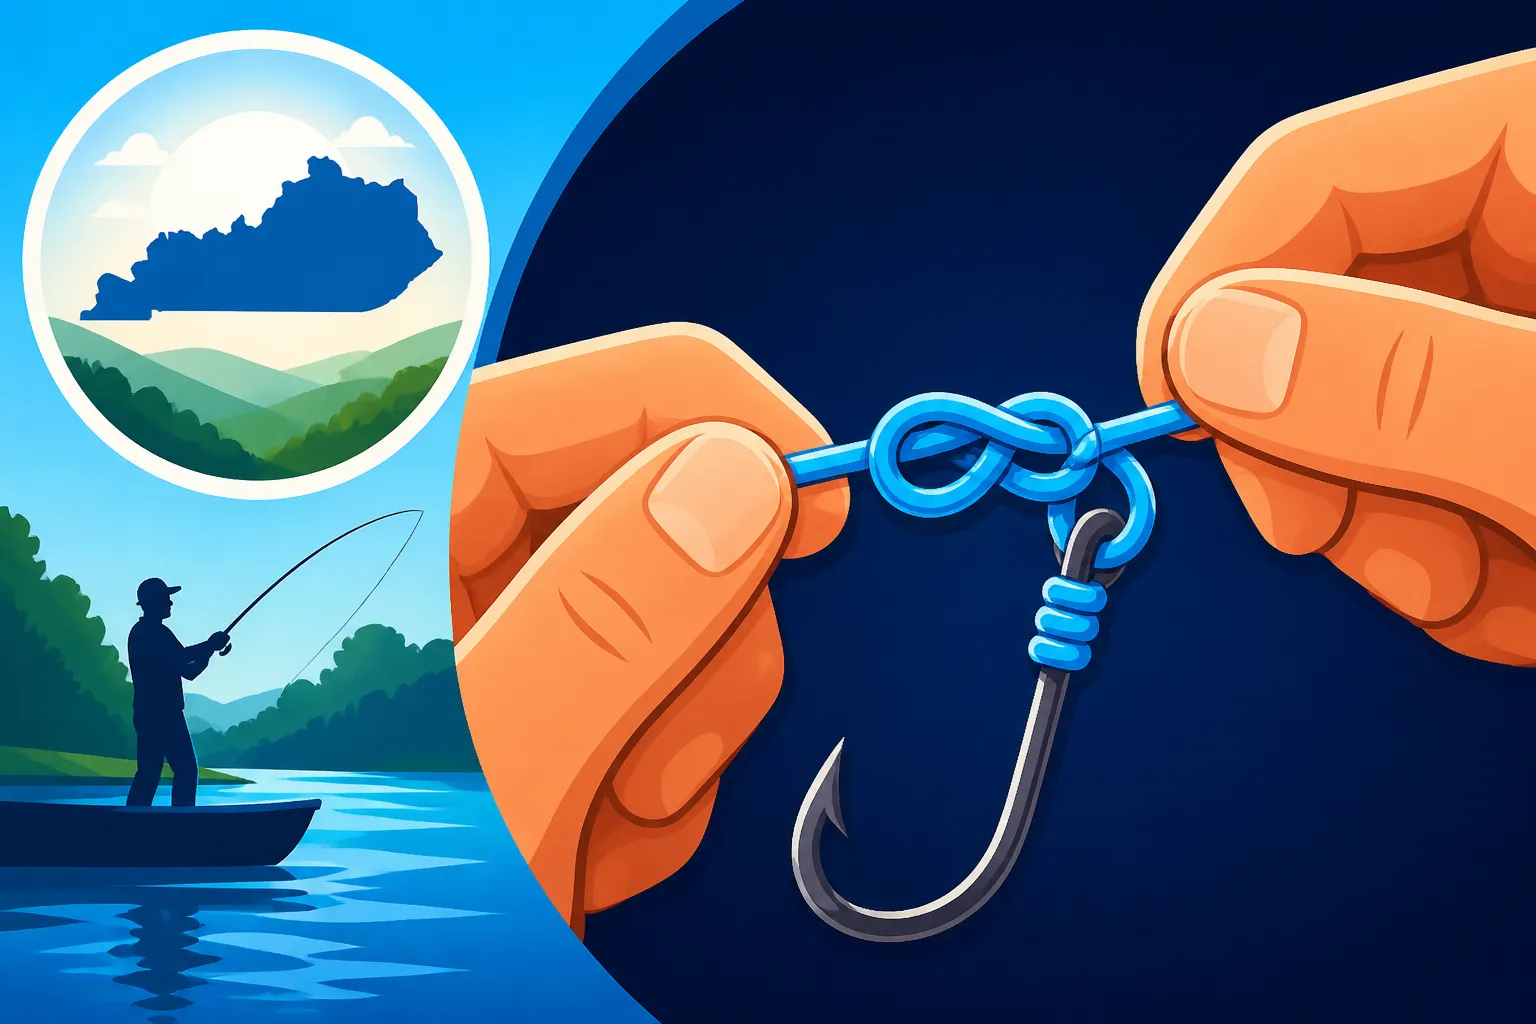
The Improved Clinch Knot is arguably the most popular knot for tying your fishing line to hooks, swivels, and lures. It's strong, relatively easy to learn, and holds up well with monofilament and fluorocarbon lines. This is probably the first knot you should master, and it will serve you well whether you're fishing for bass, crappie, or catfish.
How to Tie the Improved Clinch Knot:
- Insert and Twist: Thread the end of your fishing line through the eye of the hook or lure. Bring the tag end (the loose end) back up parallel to the main line. Wrap the tag end around the main line 5-7 times. For lighter line, you might do more wraps (7), for heavier line, fewer (5).
- Back Through the Loop: Take the tag end and thread it back through the first loop you created right next to the eye of the hook. You'll now have a small loop closer to the eye and a larger loop where your wraps began.
- Through the Second Loop: Now, thread the tag end through the second, larger loop that was formed by bringing the tag end back. This is the "improved" part of the improved clinch knot, which adds strength.
- Wet and Cinch: Moisten the knot with saliva. Slowly pull the main line and the tag end (while holding the hook) to cinch the knot down firmly. Make sure the coils snug up neatly.
- Trim: Trim the tag end, leaving about 1/8 to 1/4 inch. This small bit helps prevent the knot from unraveling.
The Improved Clinch Knot is reliable for most applications. If you're wondering Best Bait for Bluegill in Kentucky Ponds or what lure to use, this knot will securely attach it.
Palomar Knot: Strength You Can Trust
The Palomar knot is renowned for its incredible strength, especially with braided fishing line, but it works wonderfully with monofilament and fluorocarbon too. Many anglers consider it one of the strongest knots available for tying to terminal tackle like hooks, swivels, and lures. It's a fantastic knot to have in your arsenal, particularly if you're dealing with larger, hard-fighting fish or tough conditions.
How to Tie the Palomar Knot:
- Double the Line: Take about six inches of line and double it over, creating a loop. Pass this loop through the eye of your hook or lure.
- Overhand Knot: With the loop still through the eye, tie a loose overhand knot around the main line. Imagine tying a basic shoelace knot, but with the loop instead of a single strand. Do not tighten it yet.
- Pass Over the Hook: Bring the loop you've created down and pass it completely over the hook, swivel, or lure itself. This is the crucial step. Make sure the entire piece of tackle passes through the loop.
- Wet and Cinch: Moisten the knot with saliva. Pull both ends of the main line (the tag end and the standing line) simultaneously to slowly draw the knot tight. It should snug down neatly onto the eye.
- Trim: Trim the tag end closely.
Once you get the hang of it, the Palomar knot is surprisingly quick to tie, even in low light or cold weather. It's a great choice when you're setting up your Best Rod and Reel Combo for Beginners and want maximum knot strength.
Arbor Knot: Starting Right at the Spool
Before you can even tie on a hook, you need to get your fishing line onto your reel! The Arbor knot is specifically designed for this purpose: securing your fishing line to the spool of your reel. It's simple, secure, and ensures your line doesn't slip around the spool, which can cause frustrating line twists and poor casting performance.
How to Tie the Arbor Knot:
- Wrap Around Spool: Take your fishing line and wrap it around the arbor (the core) of your reel spool.
- First Overhand Knot: Tie a simple overhand knot with the tag end around the main line. Do not pull it tight yet.
- Second Overhand Knot: Tie a second overhand knot with just the tag end, about an inch or two from the first overhand knot. This second knot will act as a "stopper."
- Cinch and Trim: Pull the main line to slide the first overhand knot down until it snugs against the reel arbor. Then, pull the tag end to tighten the second overhand knot. This creates a secure loop that grips the spool. Trim the excess tag end closely.
This knot ensures that your line has a solid grip on the reel, preventing slippage that can lead to false drag settings or uneven line lay. It's a fundamental step that often gets overlooked but is vital for a good setup.
Surgeon's Knot: Joining Lines Seamlessly
Sometimes you need to join two pieces of fishing line together, perhaps to add a leader of a different test strength or material, or to repair a break. The Surgeon's Knot is an excellent choice for beginners because it's relatively easy to tie, very strong, and works well for joining lines of similar diameter, or even slightly different diameters. It's a bit bulkier than a Blood Knot, but much simpler to master for a novice.
How to Tie the Surgeon's Knot:
- Overlap Lines: Lay the end of your first line (Line A) over the end of your second line (Line B), overlapping them by about six inches. The tag end of Line A should be pointing one direction, and the tag end of Line B the other.
- Form a Loop: Using both lines as if they were a single strand, form a loop.
- Pass Through Loop (Twice): Take the tag end of Line A and the tag end of Line B, along with the main line of Line A, and pass all three through the loop you just formed. Do this a second time (two passes total).
- Wet and Cinch: Moisten the knot with saliva. Slowly pull all four ends (the two main lines and the two tag ends) simultaneously to draw the knot tight. It should form a compact, neat barrel.
- Trim: Trim both tag ends closely to the knot.
The Surgeon's Knot is incredibly useful for adding a fluorocarbon leader to a braided main line, which is a common practice for many types of Kentucky Bass Fishing: The April-May Peak Season. It provides a nearly invisible presentation while maintaining excellent breaking strength.
Here's a quick comparison of these essential knots:
| Knot Name | Primary Use | Recommended Line Type | Strength (General) | Ease of Tying (Beginner) | Notes |
|---|---|---|---|---|---|
| Improved Clinch Knot | Hooks, Lures, Swivels (Terminal Tackle) | Monofilament, Fluorocarbon | Very Good | Easy | Most common all-around knot for attaching tackle. |
| Palomar Knot | Hooks, Lures, Swivels (Terminal Tackle) | Braided, Monofilament, Fluorocarbon | Excellent | Moderate | Extremely strong, especially good for braided line. |
| Arbor Knot | Attaching line to Reel Spool | All line types | Excellent | Easy | Essential for starting a new spool of line. |
| Surgeon's Knot | Joining two lines (e.g., leader to main) | All line types (similar diameter) | Very Good | Moderate | Great for quick leader attachment; slightly bulky but reliable. |
Practice Makes Perfect: Tips for Knot Tying Success
Learning knots isn't a one-and-done deal. It requires repetition, patience, and a bit of practical wisdom. You're not just learning a sequence of steps; you're developing muscle memory and an intuitive feel for how line behaves.
Getting Started at Home
The best place to learn and practice knots is in the comfort of your own home, away from the pressure of the fish biting (or not biting). Grab a length of thicker rope or cord – something easy to see and handle. A bright color contrasting with a dark one can help you visualize the wraps. Sit down, watch a video tutorial (there are tons of great ones on YouTube!), and follow along slowly. Don't rush it. Practice each knot 10-20 times until you can do it without looking at instructions. This is a great way to prepare for your Kentucky Fishing License Guide trip.
Once you're comfortable with the thicker material, switch to actual fishing line. Start with a heavier test line, maybe 15-20 lb monofilament, which is still easy to see but feels more like what you'll use on the water. You'll quickly notice how much more slippery and fine fishing line is, requiring more precise movements. Keep your practice spool handy on the coffee table or at your desk. You might even find dedicated knot-tying tools on Amazon that hold your hook or help create loops, which can be invaluable for initial learning.
On-the-Water Challenges
Tying knots at home is one thing; tying them on the water is an entirely different beast. Picture this: it's drizzling, your hands are cold, the light is fading, and you just broke off on a snag. This is where your practice pays off. Cold, wet hands can make delicate knot tying feel impossible. Keep a small pair of line clippers (often called nail clippers, and you can find many great options on Amazon) on a lanyard around your neck for easy access.
When conditions are tough, take a deep breath. Find a sheltered spot if you can. If you're with a fishing buddy, sometimes having an extra set of hands or eyes helps. Don't be ashamed to pull out a small laminated knot card if you're still learning. Many seasoned anglers carry one for those tricky situations. Remember, a few extra seconds spent tying a good knot is always better than losing a fish because you rushed it.
The Right Tools for the Job
While you can tie most knots with just your hands and a pair of clippers, having a few specialized tools can make the process easier and ensure better knots, especially for beginners or those with dexterity issues.
- Line Clippers: As mentioned, good, sharp line clippers are non-negotiable. Trying to bite off excess line or use a dull knife can weaken your line. Look for stainless steel ones on Amazon that won't rust.
- Knot-Tying Tools: There are various gadgets available that can help hold your hook, create consistent loops, or even tie entire knots for you. These can be particularly helpful for beginners or anyone struggling with small knots. While not essential, they can definitely reduce frustration during the learning phase.
- Magnifying Glasses/Headlamps: For those tiny knots on light line, especially in low light, a magnifying glass or a compact headlamp can be a lifesaver. This is especially true if you're tying small jigs for Kentucky Crappie Daily Limit Rules.
Common Knot Tying Mistakes and How to Avoid Them
Even with practice, mistakes happen. Being aware of the most common pitfalls can help you troubleshoot and improve your knot-tying game.
Not Wetting Your Knots
This is perhaps the most critical and often overlooked step, especially with monofilament and fluorocarbon lines. When you cinch down a knot, the line rubs against itself, creating friction. This friction generates heat, and excessive heat can actually melt or weaken the line, sometimes without visible signs. Always, always, always moisten your knot with saliva or water before you pull it tight. This lubrication reduces friction, allows the knot to seat properly, and prevents heat damage. Think of it as greasing the gears – everything works smoother and lasts longer.
Insufficient Wraps or Loops
Each knot has a recommended number of wraps or passes for optimal strength. For example, the Improved Clinch Knot usually calls for 5-7 wraps. If you only do 3, the knot might slip or be significantly weaker. Similarly, ensure all loops are correctly formed and that the tag end passes through all the necessary loops. A hasty tie might skip a step, rendering the knot insecure.
It's tempting to rush when you're excited to cast, but taking those extra few seconds to ensure you have the right number of wraps and that each loop is correctly formed will save you a lot of heartache (and lures!) in the long run.
Over-tightening Too Soon
While you want your knot to be tight, yanking it too hard and too fast can be detrimental. Pulling too quickly can cause the coils to "stack" improperly or lead to the aforementioned heat damage from friction. Instead, apply slow, steady pressure to both the main line and the tag end (after wetting!) to ensure the knot cinches down smoothly and evenly. You want a firm, compact knot, not one that's been violently pulled into place.
Ignoring Line Type
Different fishing line materials behave differently, and while the knots we've discussed are versatile, it's good to be aware.
- Monofilament: Stretchy and forgiving, but prone to memory. Wets well.
- Fluorocarbon: Less stretch, very abrasion-resistant, nearly invisible underwater. More susceptible to heat damage, so wetting is absolutely crucial. Can be stiffer and harder to tie if not conditioned.
- Braided Line: No stretch, incredibly strong for its diameter, very sensitive. It's often so slick that some knots can slip. Knots like the Palomar or a triple uni knot are often preferred for braid due to their gripping power. Braid doesn't absorb water, so wetting is less about heat and more about helping the knot seat.
If you're using braided line, make sure your clippers are sharp; braid can be tough on cheaper scissors. You might even consider a heavier-duty pair of braid scissors or specialized fishing pliers from Amazon. Understanding the characteristics of the line you're using will make you a more effective angler and help you choose and tie knots with confidence for all of Kentucky's fish species. Don't forget to review Statewide Bag and Size Limits by Fish Species before you head out!
Disclaimer
This article is for general informational purposes only and does not constitute professional advice. Laws, prices and regulations vary by location and change over time. Consult a qualified professional for guidance on your specific situation.