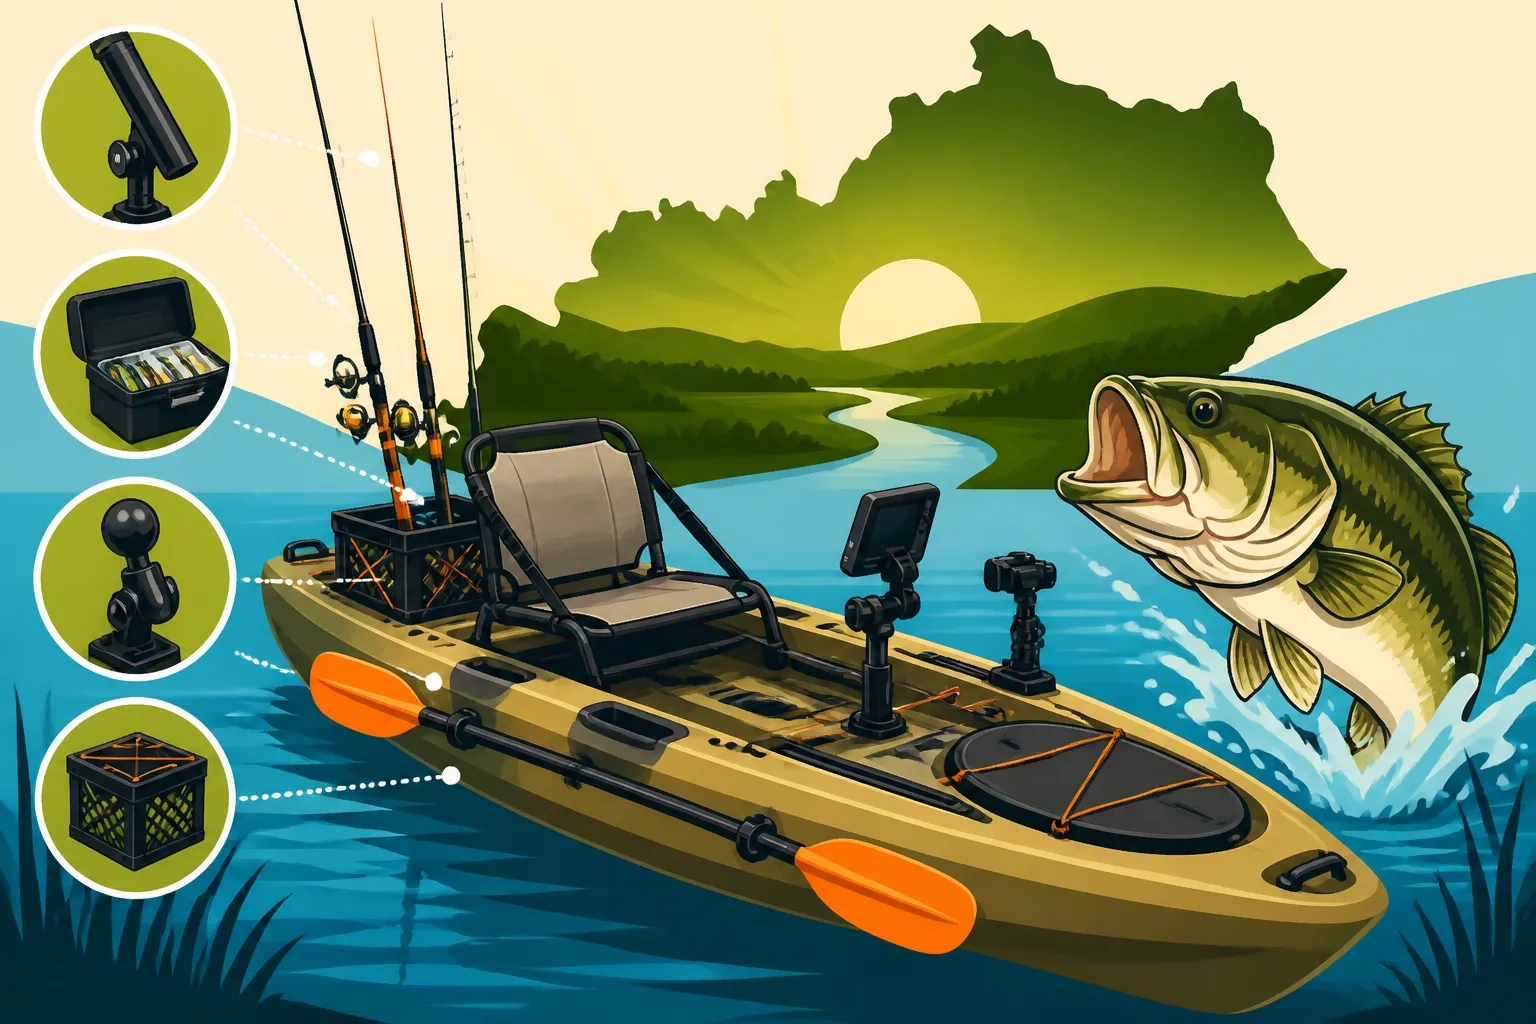
How to Rig a Fishing Kayak for Bass
Ever tried to land a Kentucky monster bass from your kayak only to find your net tangled, your rod slipping, or your paddle drifting away just when you needed it most? It’s a frustrating dance, trying to manage all your gear while wrestling a feisty smallmouth in a small craft. This guide is all about taking that chaos out of your kayak fishing experience, showing you how to rig your kayak specifically for bass, making your time on the water more efficient, enjoyable, and ultimately, more successful.
Why Rig Your Kayak for Bass Fishing Beyond the Basics
Kayaks offer an incredible advantage for bass anglers in Kentucky, allowing you to access skinny water, sneak into quiet coves, and fish areas that larger boats simply can't reach. But an un-rigged kayak can quickly become a floating yard sale of tangled lines, loose tackle, and lost opportunities. You’re not just putting stuff in your boat; you're creating a system that works with you.
The Advantage of a Purpose-Built Setup
Think about it: when you're targeting bass, especially the wary ones in places like Herrington Lake or the shallow flats of Kentucky Lake, stealth and quick reaction time are paramount. A purpose-built setup means everything has its place, is easily accessible, and designed to perform under pressure. It’s the difference between fumbling for a lure while a school of bass boils, and smoothly grabbing the exact crankbait you need for the moment. This isn't just about convenience; it's about maximizing your fishing time and minimizing distractions.
You want your kayak to feel like an extension of yourself, allowing you to focus on the fish, the cast, and the retrieve, not on where your pliers went or if your paddle is about to float off. A dedicated bass rigging ensures that your rods are secure yet within reach, your tackle is organized, and your electronics give you the edge without becoming a hinderance. It means you can quickly adapt to changing conditions, whether it's battling a sudden gust of wind or needing to make a precise cast into heavy cover. For a deeper dive into kayak choices, check out Best Fishing Kayaks for Kentucky Lakes and Rivers.
Overcoming Common Kayak Fishing Frustrations
We’ve all been there. You paddle to a prime spot, drop anchor, and then realize your bait bucket is just out of reach, or your measuring board is buried under a pile of gear. These little frustrations add up, eating away at your fishing time and enjoyment. Rigging your kayak properly addresses these common pain points head-on. Imagine being able to grab a different rod, measure your catch, or even re-rig your line without having to perform contortions or risk tipping your boat.
Consider the classic scenario: you've got a bass on the line, it's jumping and pulling, and your paddle is clanking around in the hull. With proper rigging, your paddle is securely leashed or stowed, allowing you to use both hands to fight the fish. Or perhaps you're fishing a strong current on the Ohio River, and you need to hold your position precisely. An integrated anchoring system makes that a simple, controlled maneuver, rather than a frantic struggle. These small improvements in efficiency translate directly to more time with your line in the water and fewer "if onlys."
Essential Gear for Bass Kayak Rigging
Let’s get into the nitty-gritty of what you really need to transform your basic kayak into a bass-catching machine. Each piece of gear serves a critical function, making your trips safer, more comfortable, and much more effective.
Rod Holders: Placement and Types
Rod holders are arguably the most crucial rigging component for a bass kayak. You’ll typically want to carry at least two, if not three, rods for bass fishing – one for topwater, one for a Texas rig, and perhaps another for a crankbait. Where you put them and what kind you choose makes all the difference.
For active fishing, you want holders that keep your primary rod within arm's reach for quick deployment and your secondary rod secure but ready for a fast swap. Track-mounted rod holders, like those from companies found at Bass Pro Shops, offer incredible versatility. You can slide them along a track to customize their position, whether you prefer them forward, to the side, or even behind you for trolling. Flush-mount holders, typically installed on the gunwales, are great for long-term storage or securing rods while paddling, keeping them out of the way but requiring a more permanent installation. Then there are clamp-on or ram-style holders that can be temporarily attached to rails or cockpit edges, offering flexibility without drilling.
When placing your rod holders, consider your casting hand and how you naturally retrieve. Most anglers prefer a holder for their active rod slightly forward and to the side of their dominant hand, angled slightly up. This allows for a smooth transition from holder to cast. Additional holders are typically placed behind the seat, facing backward, to keep spare rods secure and out of the way while paddling or actively fishing. Always ensure your rods are pointed away from your paddling path and won't snag on overhead branches or bank cover.
| Rod Holder Type | Best Use Case | Pros | Cons |
|---|---|---|---|
| Flush Mount | Storage, securing rods while paddling | Low profile, very secure, out of the way | Permanent installation, fixed position |
| Track Mount | Active fishing, trolling, customizable placement | Highly adjustable, versatile, easy to add/remove | Can be bulkier, may require track installation |
| Clamp/Ram Mount | Temporary setups, quick adjustments, diverse angles | No drilling required, portable, quick to adjust | Less stable than fixed mounts, can be bulky |
Storage Solutions: Crates, Bags, and Mounts
Keeping your tackle organized and accessible in a kayak is an art form. You simply don't have the deck space of a bass boat, so every inch counts. The classic milk crate setup is a fantastic starting point. You can customize a standard plastic milk crate with PVC pipes for extra rod holders, or attach smaller tackle boxes to the sides. It sits neatly behind your seat, keeping your essential tackle and tools within easy reach without cluttering the cockpit. You can find pre-made kayak fishing crates or the components to build your own at retailers like Amazon.
Beyond the crate, consider dry bags for spare clothes, your phone, or keys – anything you absolutely don't want to get wet. These can be stashed in the hull or secured to the deck. Small, waterproof tackle boxes that fit into the pockets of your vest or a consolidated bag are also excellent for keeping frequently used lures close at hand. Some kayaks come with built-in storage trays or hatches, but maximizing external organization with rail-mounted tackle boxes or waterproof gear bags can be a game changer for efficiency. Always make sure everything is secured with leashes or bungee cords to prevent accidental loss if you capsize or hit rough water. For more essential items, check out Kayak Fishing Gear for Kentucky Lakes.
Anchoring Systems for Kayaks
Trying to hold your position in a kayak without an anchor is like trying to stand still on a skateboard going downhill – nearly impossible. For bass fishing, an effective anchoring system is crucial for working brush piles, fishing ledges, or holding tight in current.
One common and effective solution is a small mushroom anchor (around 3-5 pounds) or a grappling anchor, paired with a trolley system. A trolley is a rope system that runs along the length of your kayak, allowing you to clip your anchor line to it and position the anchor point anywhere from bow to stern. This flexibility is vital, as it lets you adjust your kayak's orientation to the wind or current, keeping your cast true. For shallower water, a stake-out pole is brilliant. You simply jab it into the soft bottom to hold your position quietly. This is especially useful in the shallow backwaters of places like Lake Barkley.
When fishing larger bodies of water, like Lake Cumberland, or dealing with stronger currents, a robust anchor system can be the difference between fishing a spot effectively and drifting past it in seconds. Always have enough anchor rope – usually 50-75 feet – to accommodate different depths, and remember to secure the anchor line to your kayak, never to yourself! A quick-release system or a float at the end of your anchor line is also a smart safety measure, allowing you to easily detach from your anchor if an unexpected situation arises.
Fish Finder and Battery Integration
A fish finder isn't just a luxury for kayak bass anglers; it's a necessity, especially when you're looking for structure, depth changes, or schools of baitfish. Integrating one into your kayak requires a bit of planning, but the rewards are immense.
Most kayak anglers opt for compact, easy-to-mount units. The key is stable mounting for the display and proper transducer placement. Many kayaks have transducer-ready scupper holes, making the installation clean and protected. If not, a suction cup or temporary mount on the hull works well. The display unit itself can be mounted on a track system or a dedicated flat surface, ensuring it's visible but doesn't obstruct your paddling or casting. When considering your fish finder setup, you might want to consider Best Fish Finders for Kentucky Lake and Lake Barkley.
Powering your fish finder usually involves a small, sealed lead-acid (SLA) or lithium-ion battery. These are typically housed in a waterproof battery box and stored in a hull compartment or a dedicated spot in your crate. Wiring needs to be neat and secure, protecting connections from water and preventing snags. Make sure your battery has enough capacity for a full day of fishing, and always carry a fully charged backup if you're planning a long outing. Companies selling marine electronics and batteries, like those found on Amazon, often have robust options suitable for kayak use.
Paddle Leashes and Safety Gear
Safety should always be a top priority, and a few simple rigging additions can make a huge difference. A paddle leash is non-negotiable. It's a simple cord that tethers your paddle to your kayak, preventing it from drifting away if you set it down to fight a fish, land a big one, or if you happen to capsize. Losing your paddle in the middle of a big lake is a nightmare you want to avoid at all costs.
Beyond the leash, consider other crucial safety gear. A whistle or air horn is essential for signaling other boaters, especially in busy waters like the Ohio River or Kentucky Lake. A small first-aid kit, a bilge pump or sponge for bailing out water, and a bright, visible flag (especially if you're on busy water or out in low light) are also highly recommended. Always have a personal flotation device (PFD) that fits properly and is worn at all times. For a full rundown on crucial safety items, read Essential Safety Gear for Every Boat in Kentucky. These items don't just keep you safe; they allow you to fish with confidence and peace of mind.
Advanced Rigging for Serious Bass Anglers
Once you've mastered the basics, you might find yourself craving more power and capability. Advanced rigging can turn your kayak into a true fishing machine, giving you an edge in competitive situations or simply making long days on the water less physically demanding.
Trolling Motor Integration
Adding a trolling motor to your fishing kayak is a game changer for covering water efficiently, especially on larger lakes or when fighting wind and current. It allows you to maintain position effortlessly, silently sneak into prime fishing spots, and spend more time fishing rather than paddling.
There are several ways to integrate a trolling motor. Bow-mount motors offer precise steering, much like a traditional bass boat, but can be complex to install and manage in a kayak. Transom (stern) mount motors are more common for kayaks, often attaching to a motor mount that can be bolted or clamped to the stern. Some kayaks are even designed with specific motor-ready transoms or battery compartments. For more information on motor options, consult Best Trolling Motors for Kentucky Lake Bass Fishing.
Battery management becomes even more critical with a trolling motor. You'll need a larger deep-cycle marine battery, often housed in a dedicated battery box, and carefully secured to ensure stability. Consider running a voltage meter to monitor your battery life throughout the day. While a trolling motor adds weight and complexity, the ability to effortlessly move from one brush pile to the next, or to hold steady against a strong wind on Barren River Lake, is invaluable for serious bass anglers. If you’re considering the upgrade, also check out How to Choose a Trolling Motor for Big Water Fishing.
Lighting and Visibility for Low-Light Conditions
For those early morning bites, late evening topwater action, or even night fishing for catfish, proper lighting on your kayak isn't just a convenience – it's a safety necessity. Navigating in low light conditions requires you to be seen by other boaters and to see your own gear.
A 360-degree white light, typically on a pole, is usually a legal requirement for night operation on public waters. This ensures other vessels can spot you from any direction. Beyond regulatory lights, consider adding task lighting. Small LED strip lights or waterproof headlamps can be invaluable for tying knots, rummaging through tackle, or safely landing a fish after dark. These can be strategically placed around your cockpit or storage areas.
Red or green navigation lights (port and starboard) can also be added to the bow, further increasing your visibility to other boaters and helping them gauge your direction. Always ensure any lights you add are waterproof and securely mounted. They should not interfere with your vision, casting, or paddling. When planning night outings, make sure to consider the added battery drain from your lighting system, especially if you also have a fish finder or trolling motor running.
Camera Mounts and Electronics
Capturing those memorable catches or reviewing your technique has become an integral part of many anglers' experiences. Rigging your kayak for cameras and additional electronics requires secure mounting and power solutions.
For action cameras, RAM mounts or dedicated camera mounts that attach to your kayak's track system are popular. You can place them on the bow to capture casting action, on the stern for a wider view of your retrieve, or even on your PFD for a first-person perspective. The key is stability – you don't want shaky footage. Experiment with different angles to find what works best for your style of fishing.
Beyond cameras, you might want to integrate other electronics like GPS units, VHF radios for communication on large bodies of water, or even charging ports for your phone. USB charging ports, powered by your main battery (or a dedicated power bank), can be installed in a waterproof box, allowing you to keep devices charged throughout the day. Ensure all wiring is protected and connections are waterproofed to prevent damage from splashes or unexpected submersions. Many of these components, from camera mounts to waterproof charging solutions, are readily available from online retailers or specialty fishing shops.
Maintenance and Practical Tips for Your Rigged Kayak
Rigging your kayak is an ongoing process, not a one-time project. Regular maintenance and smart practices ensure your setup remains effective and extends the life of your gear.
Keeping Your Setup Organized and Clean
A rigged kayak can quickly become disorganized if you don't have good habits. After every trip, take a few minutes to clean and organize your gear. Rinse off saltwater if you've been on brackish water or wipe down mud and grime from freshwater trips. Ensure all your rod holders are free of debris, and check that your anchor system is neatly stowed.
This also means regularly going through your tackle boxes. Remove rusty hooks, re-spool old line, and wipe down lures. A clean and organized kayak isn't just aesthetically pleasing; it means you can find what you need instantly when the bite is on. Store your rigged kayak in a secure, protected area when not in use, ideally out of direct sunlight to prevent UV damage to the plastic and rigging components. This attention to detail will ensure your kayak is always ready for your next adventure.
Pre-Trip Checks and On-Water Adjustments
Before every single trip, especially those on large reservoirs like Kentucky Lake or the mighty Ohio River, perform a quick gear check. Is your fish finder battery charged? Are your rods securely in their holders? Is your paddle leash attached? A few minutes of inspection on land can prevent hours of frustration on the water.
On the water, be prepared to make adjustments. The wind might shift, the current might change, or you might discover a new technique that requires a different tackle setup. Your rigging should be flexible enough to allow for these on-the-fly modifications. This might mean sliding a rod holder to a new position, deploying a different anchor, or adjusting your fish finder settings. The best kayak setup is one that adapts to the conditions and to your evolving fishing style. Knowing your gear inside and out will allow you to quickly troubleshoot any issues and keep your focus where it belongs: on catching bass. You can also explore Best Rods and Reels for Kentucky Fishing to ensure your angling tools are in top condition for these adjustments.
Disclaimer
This article is for general informational purposes only and does not constitute professional advice. Laws, prices and regulations vary by location and change over time. Consult a qualified professional for guidance on your specific situation.